第03篇_Devops
第01章_Jenkins快速入门
第一节 Jenkins简介
1. 什么是Jenkins?
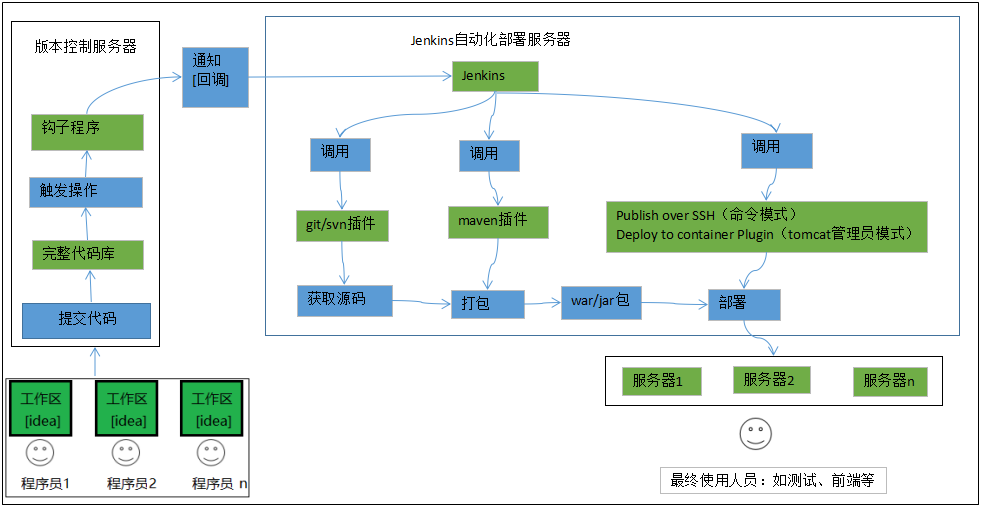
Jenkins是一个基于Java开发的持续集成工具,通过众多插件来完成一系列复杂的功能。
提示:
- Jenkins中文网:https://www.jenkins.io/zh/。
2. 安装部署
11) 下载:https://www.jenkins.io/download/ # 或 http://mirrors.jenkins.io/war-stable/latest/jenkins.war22) 运行:java -jar jenkins.war --httpPort=8080 # 初次运行时需输入初始密码、安装插件、设置管理员账户33) 访问:http://localhost:8080
第二节 Pipeline简介
1. 创建一个Pipeline
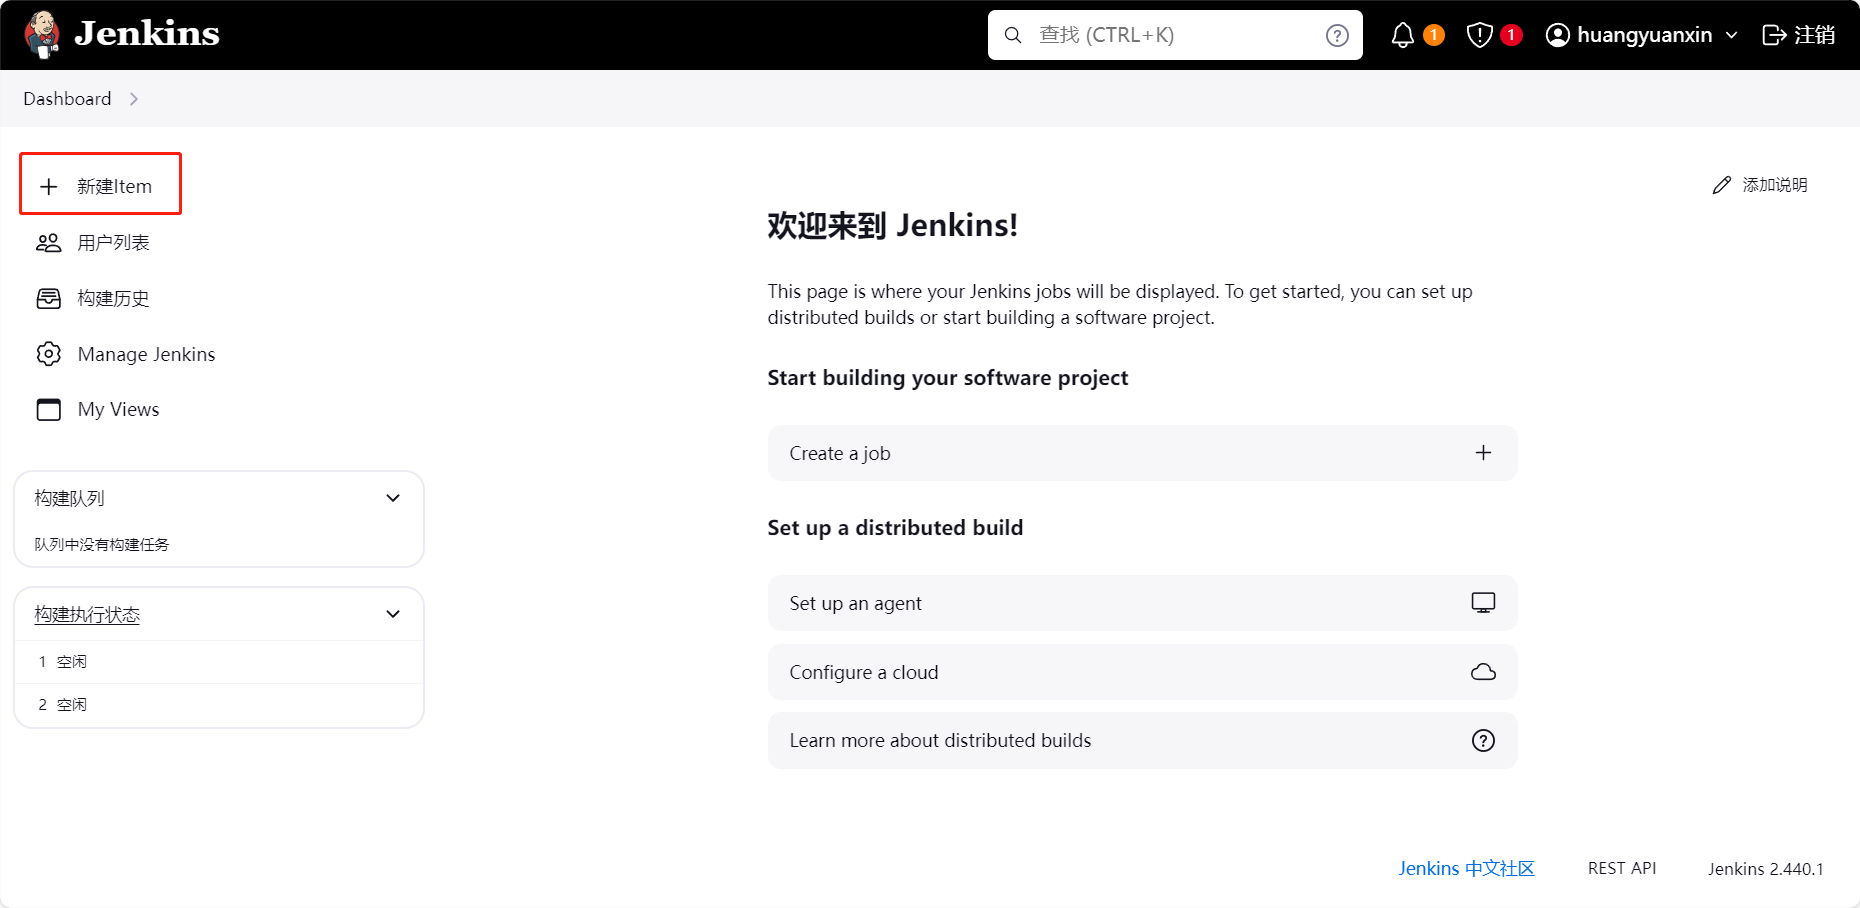
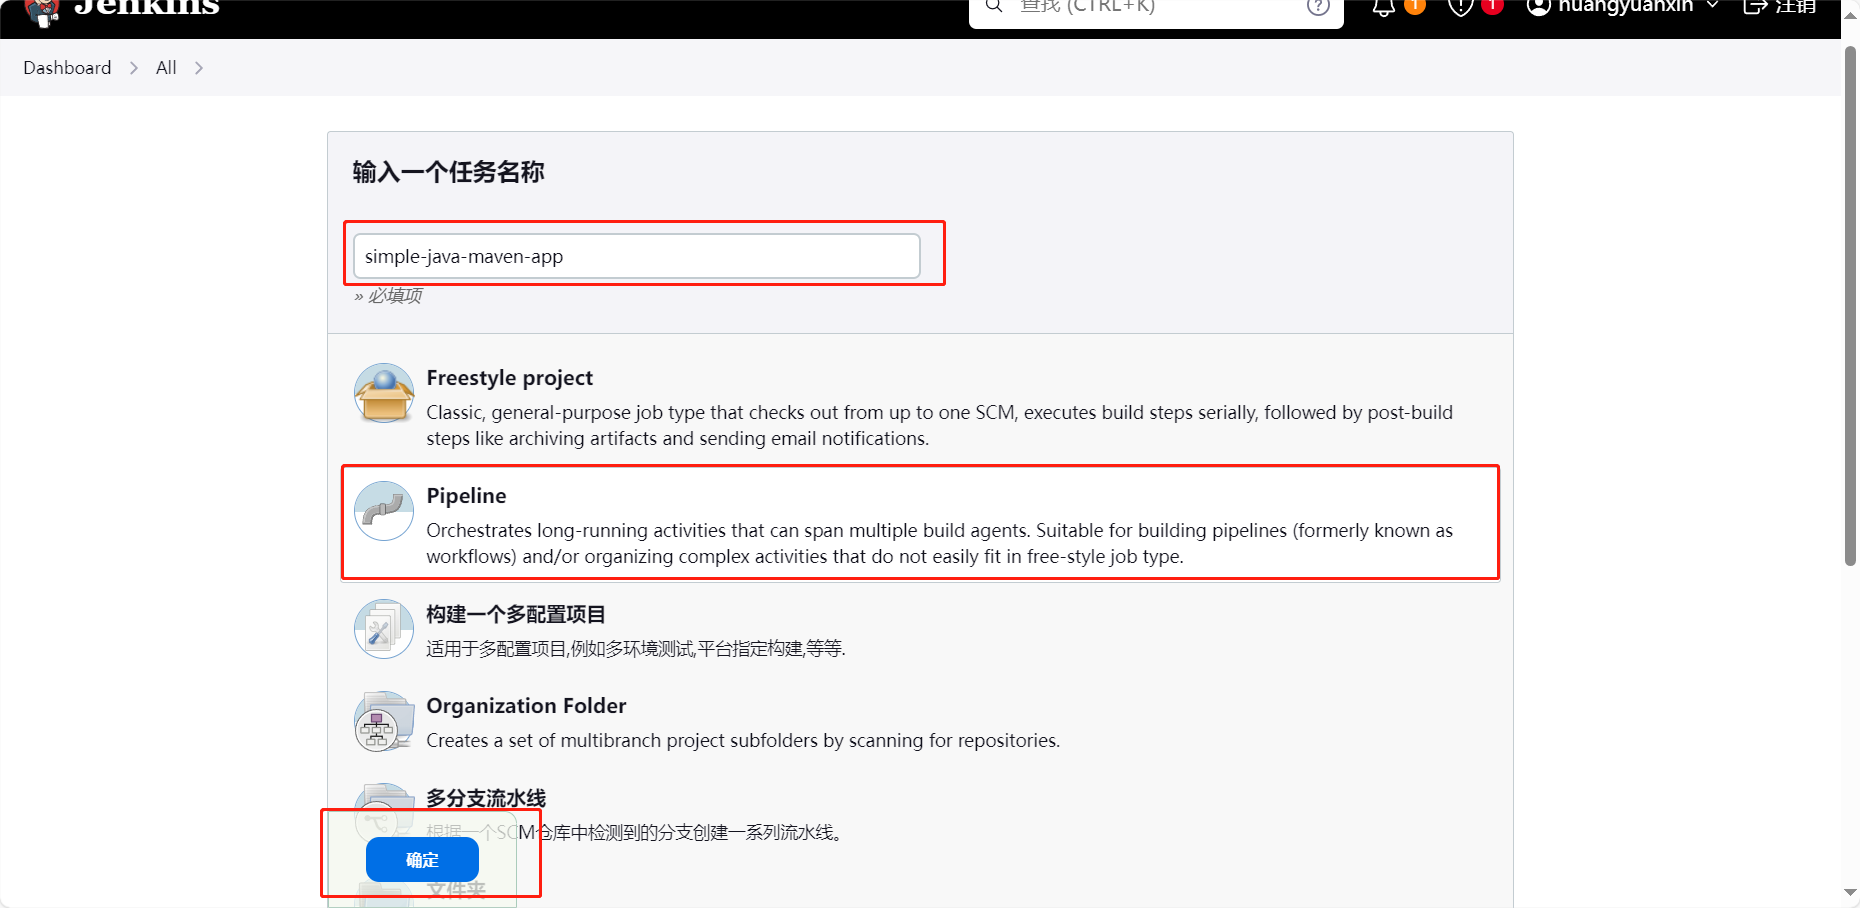
- 点击“新建Item”
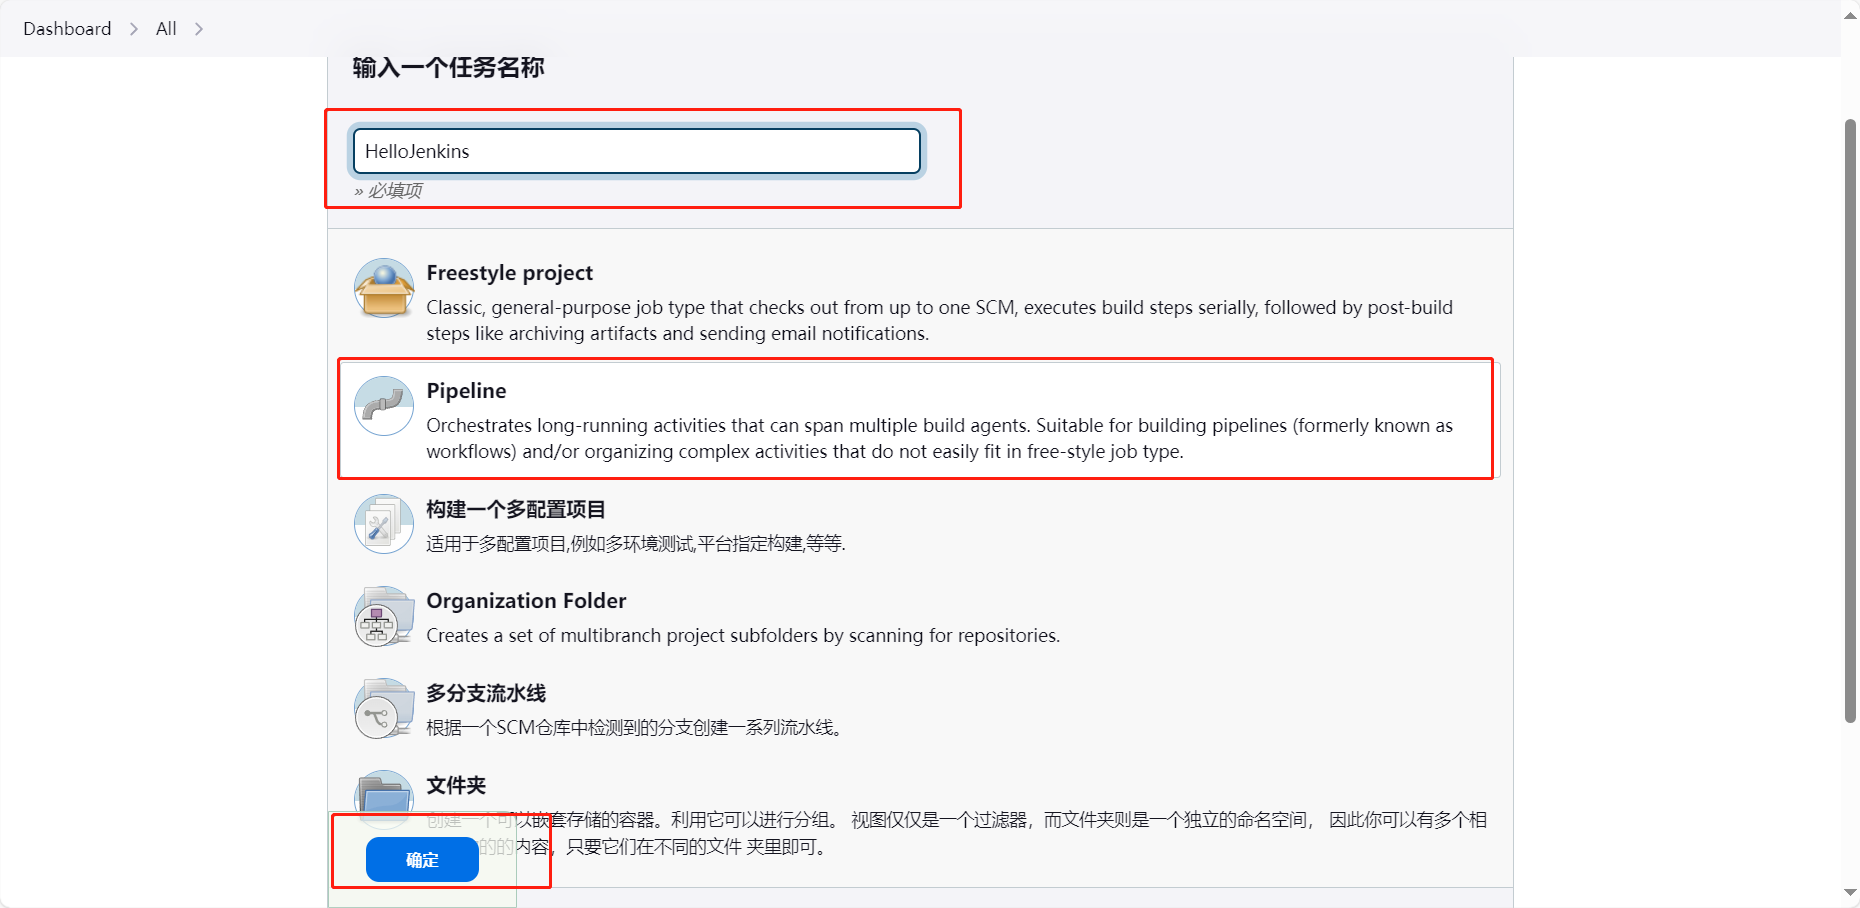
- 输入任务名称,选择“Pipeline”,点击“确定”
- 往下拉,选择“Hello World”示例
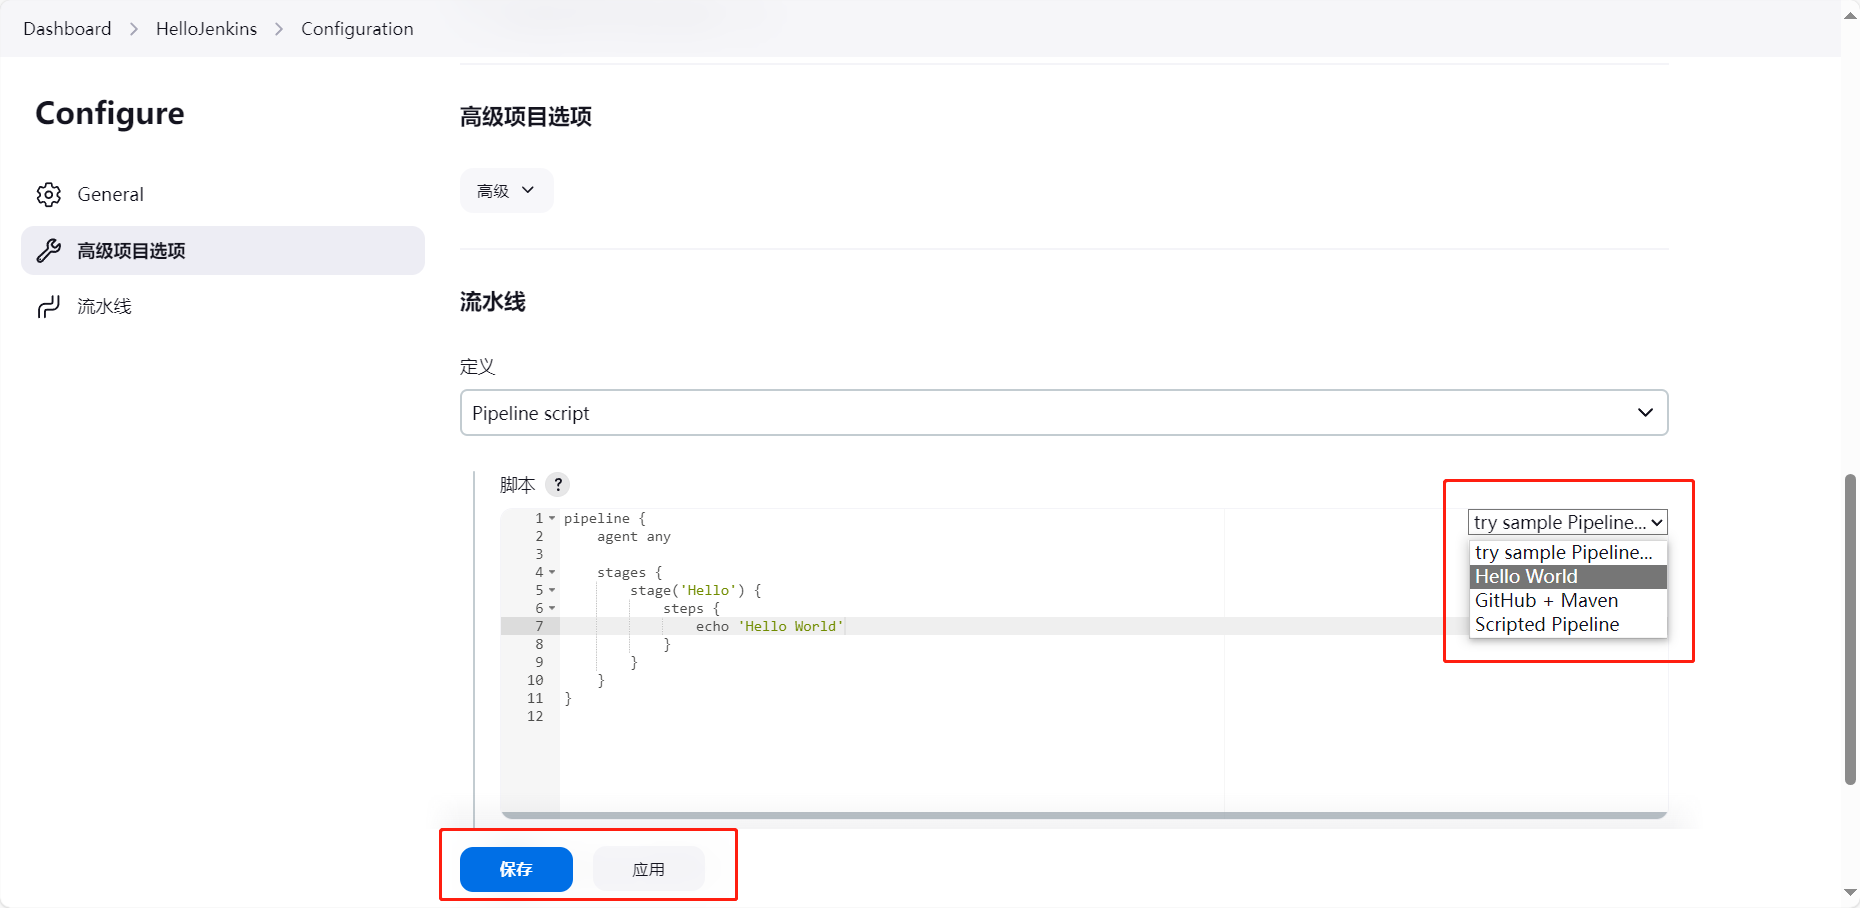
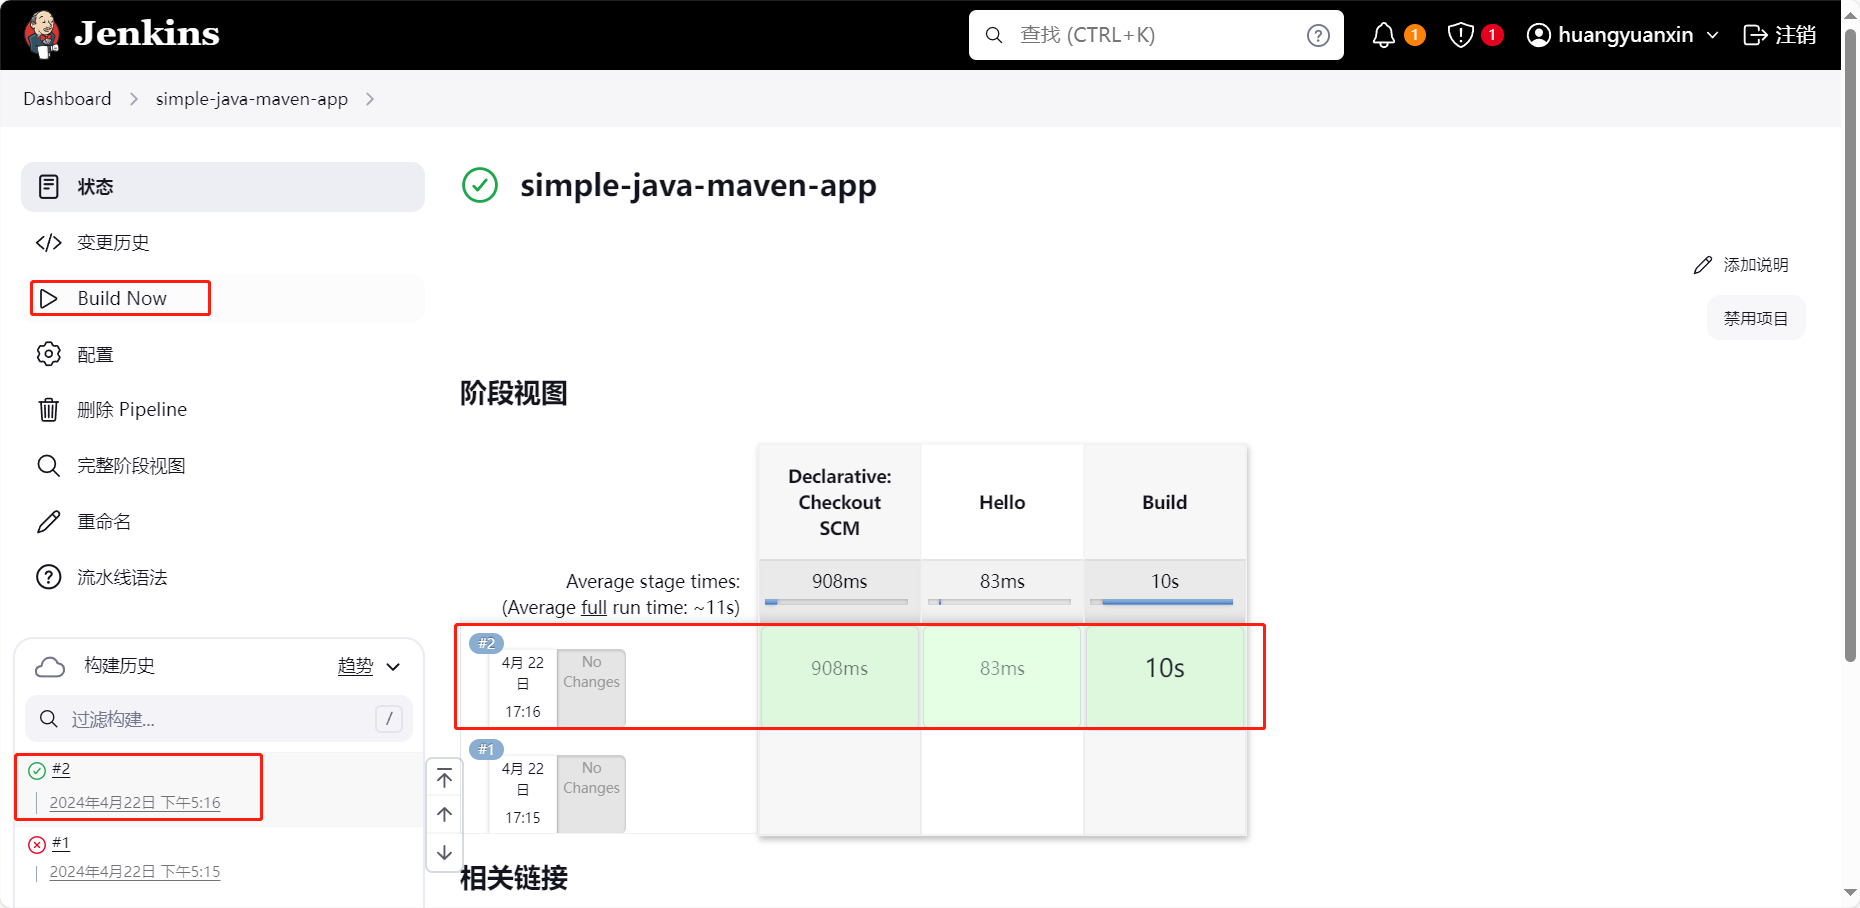
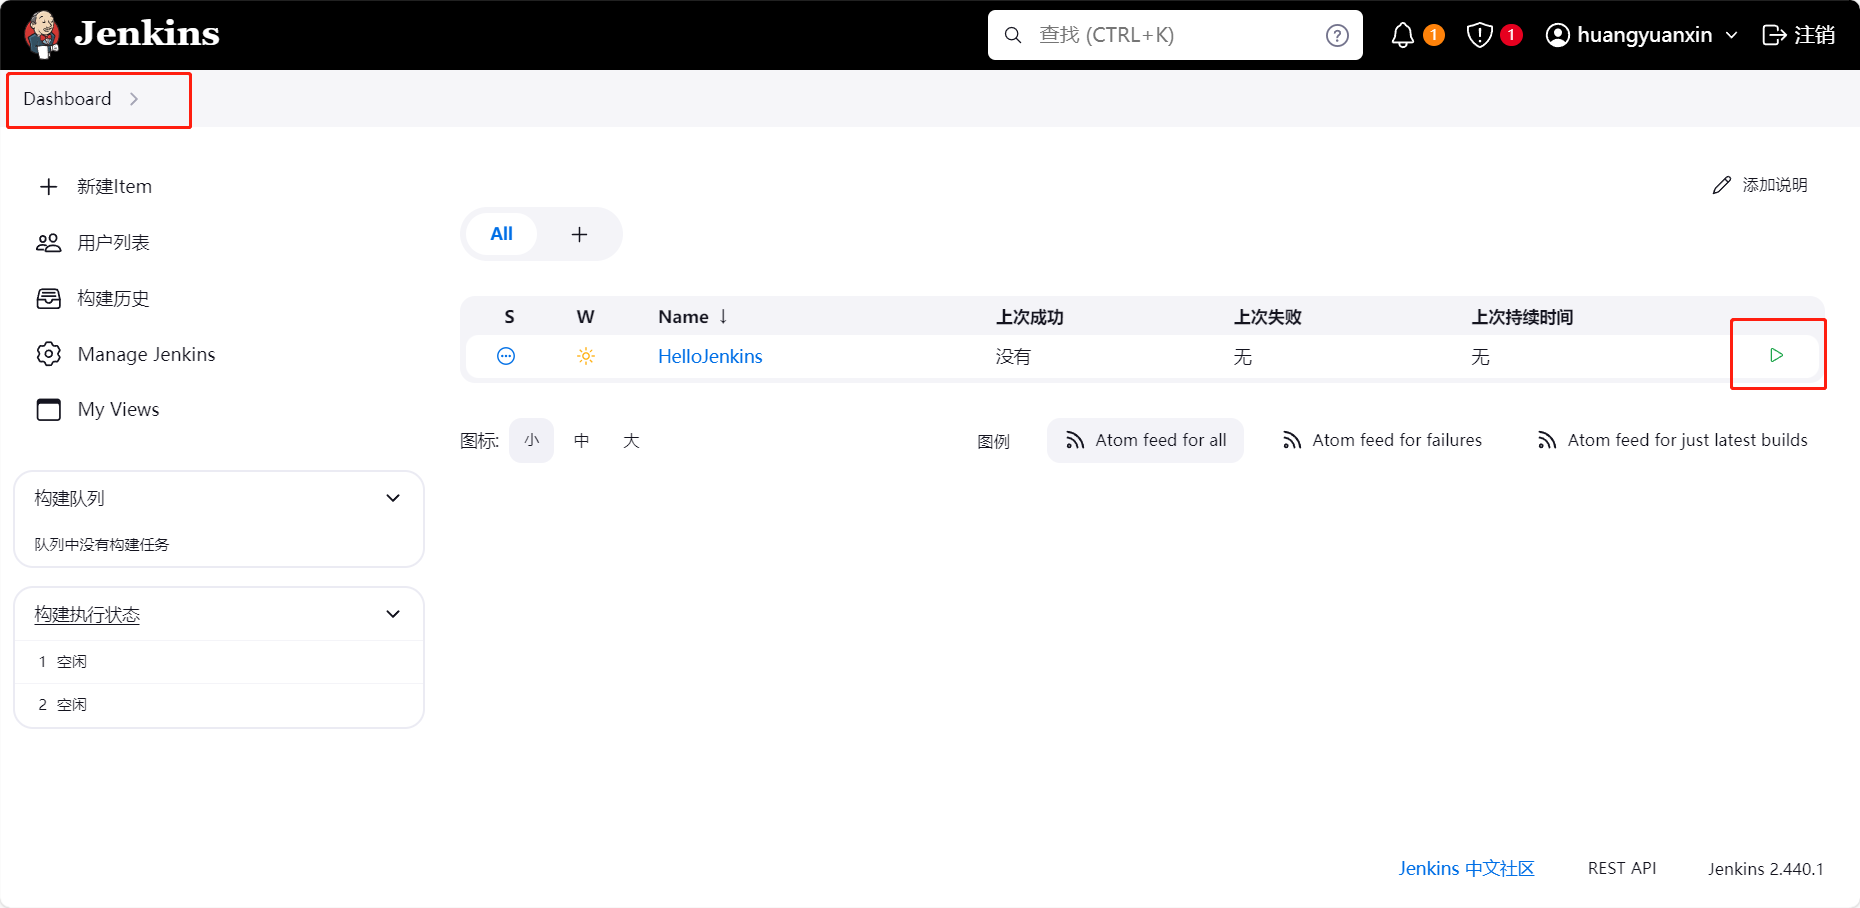
- 回到“Dashboard”页面,点击图标构建流水线
- 在“构建历史”处,可以看到构建信息
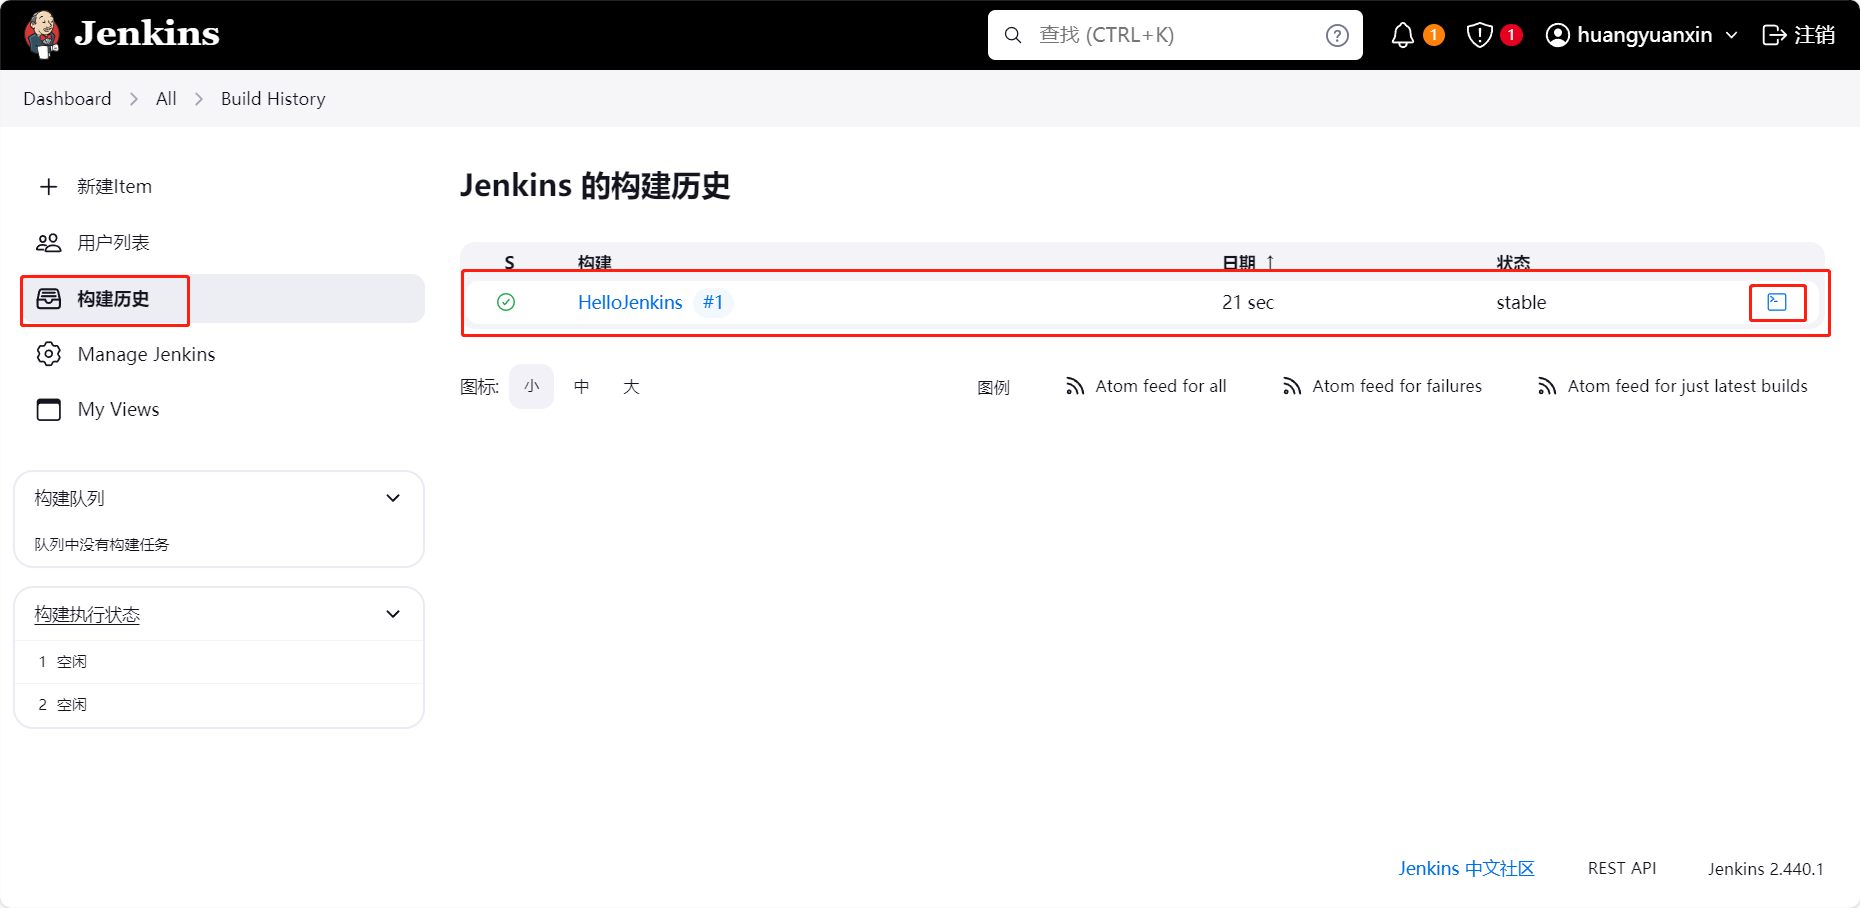
- 点击图标,可以查看构建日志等

2. 构建步骤
1) Linux命令
141pipeline {2 agent any3 stages {4 stage('Build') {5 steps {6 sh 'echo "Hello World"'7 sh '''8 echo "Multiline shell steps works too"9 ls -lah10 '''11 }12 }13 }14}
2) Bat命令
101pipeline {2 agent any3 stages {4 stage('Build') {5 steps {6 bat 'set'7 }8 }9 }10}
3) 超时与重试
x1pipeline {2 agent any3 stages {4 stage('Deploy') {5 steps {6 // 重复执行 flakey-deploy.sh 脚本3次7 retry(3) {8 sh './flakey-deploy.sh'9 }10
11 // 等待 health-check.sh 脚本最长执行3分钟12 // 如果 health-check.sh 脚本在 3 分钟内没有完成,Pipeline 将会标记在“Deploy”阶段失败13 timeout(time: 3, unit: 'MINUTES') {14 sh './health-check.sh'15 }16 }17 }18 }19}20
151pipeline {2 agent any3 stages {4 stage('Deploy') {5 steps {6 // 重试部署任务 5 次,但是总共花费的时间不能超过 3 分钟7 timeout(time: 3, unit: 'MINUTES') {8 retry(5) {9 sh './flakey-deploy.sh'10 }11 }12 }13 }14 }15}
4) 完成时动作
当 Pipeline 运行完成时,你可能需要做一些清理工作或者基于 Pipeline 的运行结果执行不同的操作, 这些操作可以放在 post 部分。
281pipeline {2 agent any3 stages {4 stage('Test') {5 steps {6 sh 'echo "Fail!"; exit 1'7 }8 }9 }10 post {11 always {12 echo 'This will always run'13 }14 success {15 echo 'This will run only if successful'16 }17 failure {18 echo 'This will run only if failed'19 }20 unstable {21 echo 'This will run only if the run was marked as unstable'22 }23 changed {24 echo 'This will run only if the state of the Pipeline has changed'25 echo 'For example, if the Pipeline was previously failing but is now successful'26 }27 }28}
3. 执行环境
agent 指令告诉Jenkins在哪里以及如何执行Pipeline或者Pipeline子集
1) docker方式
121pipeline {2 agent {3 docker { image 'node:7-alpine' }4 }5 stages {6 stage('Test') {7 steps {8 sh 'node --version'9 }10 }11 }12}
4. 环境变量
1) 全局环境变量
2) 阶段环境变量
161pipeline {2    agent any3
4    environment {5        DISABLE_AUTH = 'true'6        DB_ENGINE    = 'sqlite'7    }8
9    stages {10        stage('Build') {11            steps {12                sh 'printenv'13            }14        }15    }16}
5. 记录结果
1) 测试结果(junit)
151pipeline {2 agent any3 stages {4 stage('Test') {5 steps {6 sh './gradlew check'7 }8 }9 }10 post {11 always {12 junit 'build/reports/**/*.xml'13 }14 }15}如果存在失败的测试用例,Pipeline 会被标记为 “UNSTABLE”,在网页上用黄色表示, 这不同于使用红色表示的 “FAILED” 失败状态。
2) 构建结果
241pipeline {2    agent any3    stages {4        stage('Build') {5            steps {6                sh './gradlew build'7            }8        }9        stage('Test') {10            steps {11                sh './gradlew check'12            }13        }14    }15
16    post {17        always {18            // 构建结果记录和存储19            // 参数:文件的路径、文件名和 fingerprint20            archiveArtifacts artifacts: 'build/libs/**/*.jar', fingerprint: true21            junit 'build/reports/**/*.xml'22        }23    }24}
6. 发送通知
1) email
71post {2 failure {3 mail to: 'team@example.com',4 subject: "Failed Pipeline: ${currentBuild.fullDisplayName}",5 body: "Something is wrong with ${env.BUILD_URL}"6 }7}
7. 部署
1) 阶段即为部署环境
一个常见的模式是扩展阶段的数量以获取额外的部署环境信息, 如 “staging” 或者 “production”,如下例所示。
111stage('Deploy - Staging') {2 steps {3 sh './deploy staging'4 sh './run-smoke-tests'5 }6}7stage('Deploy - Production') {8 steps {9 sh './deploy production'10 }11}
2) 人工确认
261pipeline {2    agent any3    stages {4        /* "Build" and "Test" stages omitted */5
6        stage('Deploy - Staging') {7            steps {8                sh './deploy staging'9                sh './run-smoke-tests'10            }11        }12
13        // 人工确认14        stage('Sanity check') {15            steps {16                input "Does the staging environment look ok?"17            }18        }19
20        stage('Deploy - Production') {21            steps {22                sh './deploy production'23            }24        }25    }26}
第三节 从SVN检出并使用Maven构建
1. 创建一个Pipeline
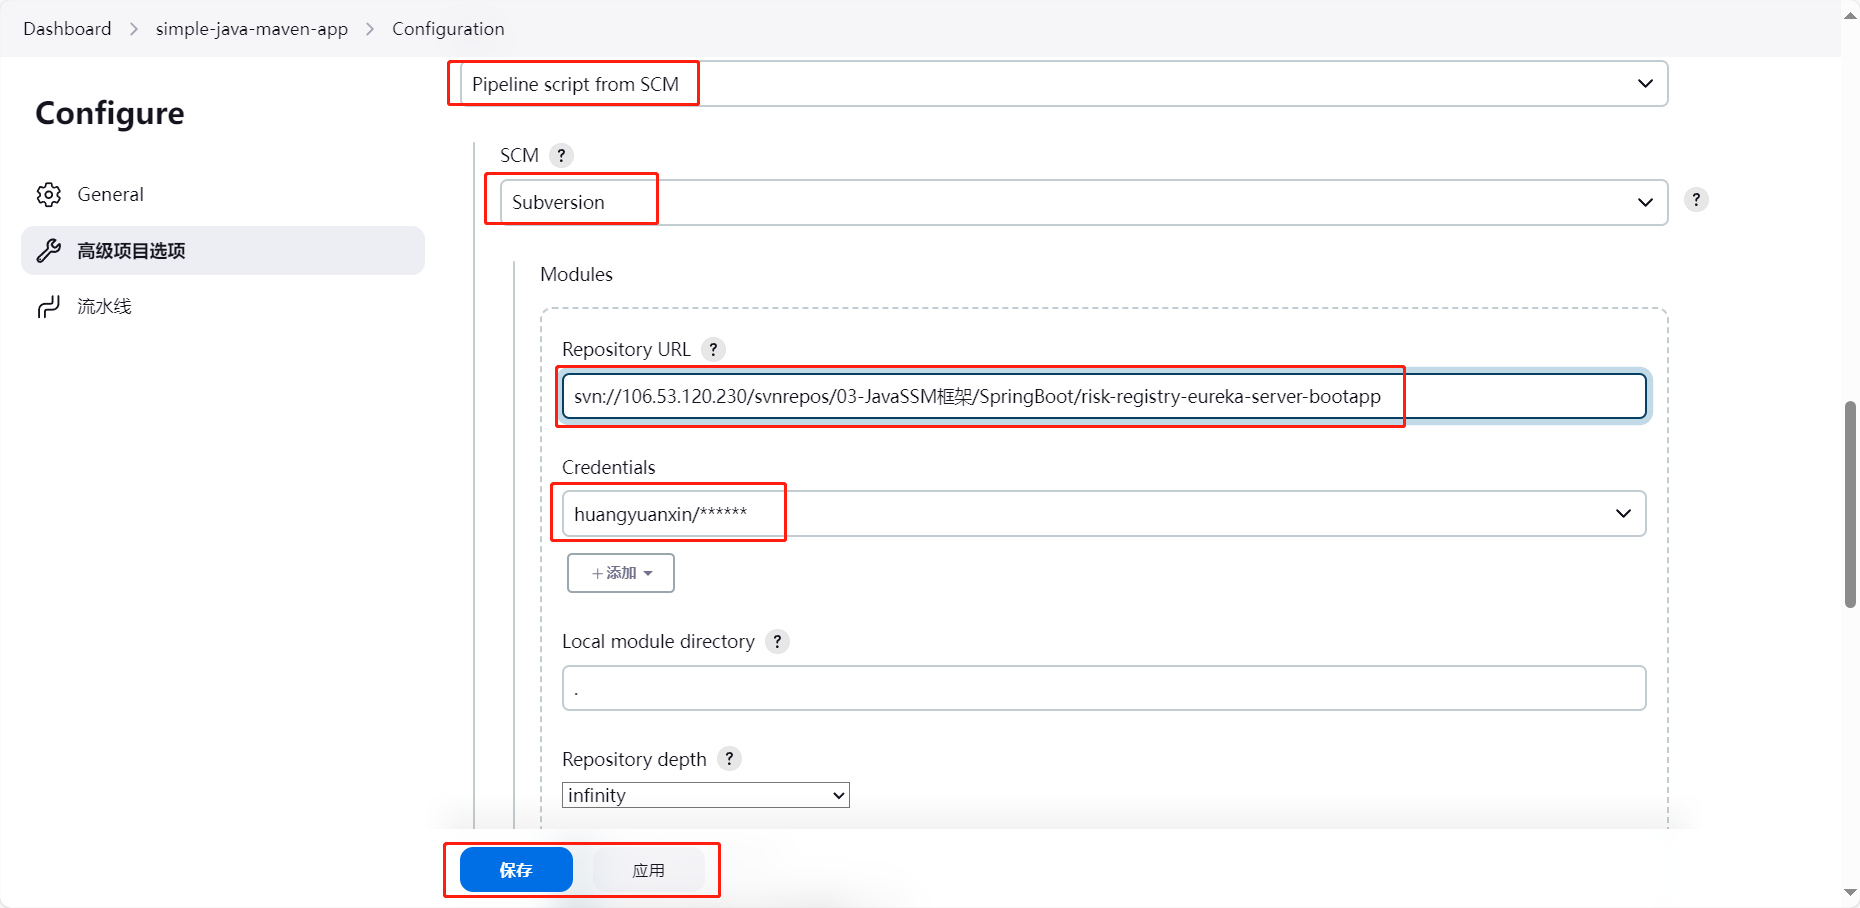
2. 配置SVN地址
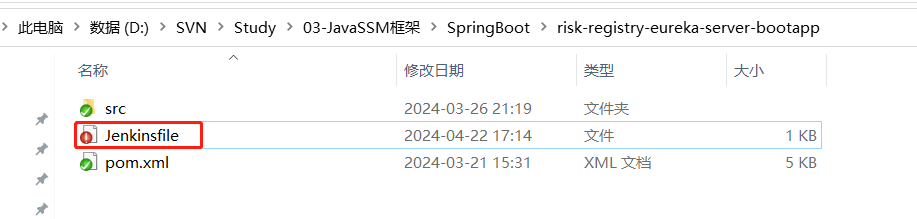
3. 编写Jenkinsfile并上传
191pipeline {2    agent any3
4    stages {5        stage('Hello') {6            steps {7                echo 'Hello World'8            }9        }10        11        stage('Build') {12            steps {13                bat 'mvn package'14            }15        }16        17    }18}19
4. 执行构建